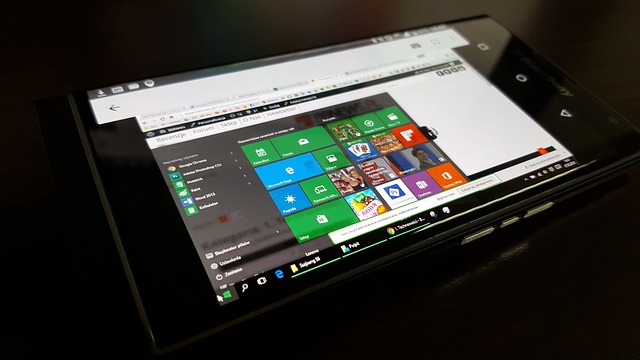
It was a great time when Microsoft Windows 10 made a grand entry in the market and undoubtedly, this is considered as the finest User Interface operating system, or one can say that it is an extremely user-friendly operating system.
Majority of users usually update their Windows version to Windows 10 and while they update, they face concerns of windows 10 taskbar not working.
This is the concern with lots of software drivers and starts menu. Whenever you face issues of windows 10 taskbar not responding then follow the methods described in this article:
4 Ways to Fix Windows 10 taskbar not working
Windows 10 users sometimes make a complaint about taskbar not working windows 10. There may be different causes for this issue and the difficulty is that how to solve the issue. Luckily, there are total 4 methods described below, and they assure you to resolve issues of windows taskbar not working.
Also, Read:
- How to fix SSL connection error in Google Chrome
- Methods to erase a message from Android Phone
- How to fix “This webpage has a redirect loop” problem
Method 1: Restarting your Windows 10 system
It is common to understand that the functionality of taskbar would be fully restored once there is a fresh restart of the Windows Explorer. The method is considered as the easiest solution to resolve Windows 10 taskbar stops working issue.
It helps you get rid of issues of unclickable taskbar Windows 10 error. All you need is to simply restart your system. It is one of the most suggested methods to users as any user with even no knowledge of computer can restart the system.
Simply by restarting your Windows 10 system, you can easily get Windows 10 taskbar fix and can also save yourself from tons of useless attempts doe to fix the problem. After updating your Windows system to Window 10, simply restart your Windows Explorer system.
In case, you are unable to manually restart your system, you can even restart your system by simply following the below steps.
Step1: Hit “Ctrl+Shift+Esc” key together
Step2: Now a Task Manager Dialogue box will be shown.
Step3: Choose process tab.
Step4: Then choose Windows option.
Step5: Finally, restart your Windows 10 system.
Once you have restarted your system, you would find that unclickable taskbar Windows 10 problem is solved. If in case, restarting your Windows system failed to work for you then don’t worry, the issue in the system can be easily resolved by implementing another method as well as and they are very simple to try.
Method 2: Installing the updated version of drivers
In some cases, if you are using incompatible or outdated device drivers with your Windows 10 system, some windows 10 taskbar not loading issues can occur, such as windows 10 taskbar not responding, cannot right click on Windows 10 taskbar and Windows 10 taskbar unable to retract on its own.
Majority of times, this error occurs due to the software driver, i.e., the particular version of software drivers being used by you is basically outdated or is not fully compatible with the Windows 10 system.
Therefore, in order to resolve Windows 10 taskbar not working issue, you need to update the particular version of software drivers that you are currently using.
For solving the issue, mentioned below are the steps related to the method to download the drivers’ latest version and ways to install them over your Windows 10 system. Just follow the below steps and the final result would be that you would have an updated software driver version, which will also boost the entire working of your system.
Step 1: Initially, you need to identify the Outdated Drivers.
It is known that proper scanning would also assist you in offering the required and important details regarding the outdated version, broken, corrupt, or incompatible driver, for instance, audio drivers, graphics drivers, etc. The step indirectly resolves the issue of windows 10 taskbar broken.
Step 2: Now download and install the UpdateWindows 10 Drivers.
In order to get improved performance of the Windows 10 system, it is recommended that you always make use of the latest and updated version of every software in order that at the end, you could relish the exciting and new features of the particular software.
Step 3: The last step of this method is to restart your Windows 10 system and after that, you are completely free from windows taskbar not working issue.
It is always a good habit that you always restart your System whenever you update or install any software. This is because, once you restart, every update will function. After using this method, there would be no issue of windows 10 taskbar not working after an update.
Method 3: Use of Windows PowerShell
PowerShell is recognized as a command line utility tool and the tool can be utilized to solve issues of windows 10 bottom bar not working. In the present method, you are required to reinstall the software application. At times, when installing the software, some error may take place due to which the process of installation stays incomplete, and it might also show error while operating the software.
Hence, by reinstalling the software problem could be effortlessly resolved. In order to reinstall any software, just follow the below steps:
Step1: Initially, Right-click on Start Menu.
Step2. Now open Command Prompt (Remember to run a command prompt as admin always).
Step3. After that, type PowerShell into the command prompt and hit Enter.
Step4. After entering the PowerShell command, you are required to write below things into the command prompt
“Get-AppXPackage -AllUsers | Foreach {Add-AppxPackage -DisableDevelopmentMode -Register “$($_.InstallLocation)\AppXManifest.xml”}”, press enter.
Step5. Now close the PowerShell.
Step6. You need to modify the directory address to C:/Users/name/AppData/Local/
Step7. Finally, delete “TileDataLayer” folder.
After carefully completing these steps, you can reinstall the software application successfully. Now, just restart your Windows 10 system, and it will be found that the issue is resolved.
Method 4: Adding of a New User Account to your System
The issue of taskbar not working windows 10 can also be solved by this method. In this method, you need to add another user to your system in order to handle the issue. You can say that you need to log out right from this user account and then after login through the help of a new user account
In order to add a new user to your system, just follow the below steps carefully:
Step1. Open Settings with the help of Win + I.
Step2. Choose Accounts from the setting option displayed.
Step3. From the list shown, select Family & Other Users.
Step4. Now choose option Add someone else to this PC under Other Users.
Step5. From the same list, choose, I don’t have this person’s sign-in information.
Step6. Now just click on the add user option.
Step7. After that, create the user
Step8. Click on Next
Step9. Modify the account type from new account to an administrator account.
Step10. Lastly, click on OK.
The steps and procedures involved indicate that the method is easy and effective in solving the issue.
Also, Read:
- Xbox One Emulator For Windows 10 2019
- Fix Driver Power State Failure in Windows 10
- How To Fix Nvidia Installer Failed Issue Window 10
- Fix Xbox 360 Controller Driver Not Working on Window 10
- How To Check PC for Window 10 software and driver compatibility
Conclusion:
The discussed methods are tested and so they would execute seamlessly. If these methods did not work for solving windows 10 start menu and taskbar not working issue or windows taskbar not working issue then just reset your system.
It is important to remember that prior resetting your Windows 10 system, take the back-up of your significant data always. This is due to the fact that resetting your system would delete every data from your system. Although, System Restore would help to retain the copy of system files.


very good post, as i am technical support executive providing support for our USA based customer over the phone and they often called for this issue. this will help me a lot.